Monday, February 13, 2012

Valentine Review


I never thought I enjoyed decorating and making crafts for Valentine's Day until now......
Here's a peek at all the Valentine Crafts I made this year....


Happy Crafting!
Smiles,
 Jill

Linking this up to
I heart naptime
Skip to my Lou
Sisterhood of Crafters

Sunday, February 12, 2012

Life with you makes perfect sense....


Hello and welcome to Jaihart!
 If you're following along with the Cooking with Cricut Love Song Blog Hop and you've just left the very talented Jenny R you're in the right place!  If you've just come across my blog and would like to follow along you can start here.

It's all about Love Songs....
   When I think about my favorite love song, immediately Tim McGraw's "Best Friend" song pops into my head! That song depicts my husband perfectly.  The first time I heard that song I was on a plane to Miami, FL. I had just put random new songs I had never heard on my IPOD...the original IPOD...still black and white..old school...gotta love it....anyways, the moment I heard this song I started to cry because every word he was singing was how I felt about my husband! It's a wonderful song and I still cry every time I hear it! It's just the best song!  Sorry to get sappy with you there for second...ha!
  Here's my project


 "Life with you makes perfect sense...."


the inside says...


I used Imagine more cards for the heart cut at 1.0
The children are from Nursery Rhymes (pat-a-cake) cut at 2.5 
I actually used a sewing machine for the edges
The ribbon is from Hobby Lobby
I just typed out "Life with you makes perfect sense..... you're my best friend" on the computer


Thanks for visiting my blog today!

We hope you’ll join us and link up your favorite love song inspired project at CookingWithCricut.com.  
One lucky entry will be chosen by random.org to win a $10.00 gift certificate provided by 
PaperCraftingWorld.com!  And make sure you leave a comment, too!  One lucky commenter will also 
receive a $10.00 PaperCraftingWorld.com gift certificate!

*****************BLOG CANDY ALERT**************


  For a chance to win the blog candy, tell me your favorite love song!


Thanks for joining us today on our hop! Now head on over to the talented Bonnie at Scrapper's Ranch!


Happy Crafting!

Smiles, 

Jill

Like me here |  Party with me here  | Follow me here

Linking up to

Friday, February 10, 2012

Valentine Popcorn


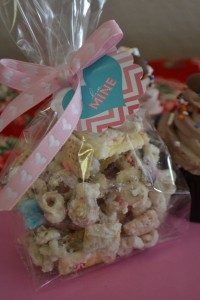
Okay so I feel like Kristyn over at Lil Luna has been reading my mind! I was going to make Valentine Popcorn and she did too! The popcorn she made looks super yummy, but it is different than mine. The popcorn I made is a chocolate covered popcorn with heart sprinkles! I made this popcorn at Halloween and everyone loved it, so I decided to make it again except this time add a little Valentine fun in, using heart shaped sprinkles!  Here it is:

I "Mustache" You a question....


I got my inspiration for this valentine from Lil Luna.  She used wax mustaches, I couldn't find wax mustaches anywhere, and then I remembered I got a new cricut cartridge called Billionaire and it had mustaches on it. I cut the mustaches at 1.5.  If you don't have a cricut, you could find a pattern online and trace them and cut them out.   Here they are


Aren't these hysterical?! My son LOVES them!

Here's the topper I made to go over the sandwich baggies I used to place the sucker mustaches in.


I used Picnik.com to place the mustache on my son in the picture.....so funny! I couldn't resist!  I figured I might as well get good use out of Picnik.com before they're gone.....sad face....crying sad face!  What am I going to do without Picnik.com?!  Anyways, I hope you got a laugh from these silly valentines! I had a blast making them!

Happy Crafting!


Smiles,

Jill

Like me here |  Party with me here  | Follow me here

Linking this up with
The Grant Life
30 Handmade Days
Paper Issues
Itsy Bitsy Paper Blog


Thursday, February 9, 2012

Vintage Valentines


I just wanted to share some cute vintage valentines that I found on The Splendidly Imperfect Miss M
They are so super cute that I decided to make a garland or banner as they say now-a-days:) ha!


All I did was print the valentines, laminate them, put eyelets on the side of each valentine, and run a ribbon through them. I can't get enough of these cute little sayings! "Tell me 'weather I still rain' in your heart my vanlentine"  So funny! Anyways, I hope you're having a wonderful day!

Happy Crafting!

Smiles,
Jill 


Wednesday, February 8, 2012

You are Sweet Treats


Since my Mops girls (a mom's group I'm in) are so sweet, I decided to make them a treat and I gave it to them at our meeting last week.  Here they are


I put them in little bags with a treat topper from Love from the Oven

I didn't get a good photo of the bags put together, but if you go to Love from the Oven she has some awesome ideas and photos of bags put together! So go to her sight and in-vision what my treats would look like in the bags. I used the bags "A Valentine Treat For Someone Sweet"! Then tell me what you think...ha!

Anyways, if you want to make some...........

Monday, February 6, 2012

Birthday Cake Topper and Cake plate


My husband's birthday was last Friday (you can see a fun little treat I made for him here) and I made a cake for him. Not just any old cake, a specific cake. I wanted to make a fancy cake using my cricut cake machine (you can see a fancy cake I made here), but NOOOO he wanted a yellow cake with rainbow chip frosting.  I guess he kept seeing the box in our pantry and on the side panel there was a cake with rainbow chip frosting and he just really wanted one. ha! Anyways, so I made him one.  I really wanted to make a banner across the top of the cake.  It wasn't working the way I wanted, so I scrapped that idea and made this cake topper:


It's very silly, but I thought it was fun!
I wish I was able to show you a picture with the candles in the cake.
They really finished the look off, but unfortunately I didn't get one.
Oh well, you can in-vision it, right? 
I also wanted the cake to sit on a fun cake plate, so I went ahead and made one! 
Want to learn how?

Sunday, February 5, 2012

Sundays are Lovely #6


It has been a busy week over here at Jaihart! 
I feel very honored that two of my projects were featured on Tip Junkie!


You can view my dynamite project here


You can view my soap dispenser here

I feel very honored! I hope all of you had a great week as well!

Thank you to all who linked up last week!
The most view project was by Pink Cake Plate
This is her Valentine Treat! YUMMY!
Make sure to grab a feature button on the right!


I am going to be leaving this link party open for the rest of February! 
You can link up any project new or old, just make sure you link back here.
You can copy my code for the link party button on the right or just link back.
Have a great day! 
Smiles, 

Jill


Friday, February 3, 2012

Yummy Pasta


This pasta is called 'yummy pasta' because I made it up and my family thinks it's yummy! So that's what we call it! I used red bell peppers in it and I think it looks kind of festive for Valentines Day, so that's why I wanted to share it with you. I must apologize right now because I didn't use exact measurements.  I make recipes up all the time and just go with what tastes good.  I know it's hard to follow a recipe the first time you make it and it says, "A little bit of______ and a touch of _____" . So basically all I can say is for you to taste it and go with it!

Want to make some Yummy-ness?

Happy Birthday to my Husband


 I'm such a lucky girl to have such a wonderful husband. He's caring, thoughtful, a great dad, and boy does he love his video games:) I blog and do crafts, while he plays his video games...it works out very well! Anyway, I wanted to share a little treat I made for him to have when he wakes up in the morning.  I like to put little things around the house to make him feel special on his birthday.  In college, my roommate put sticky notes around saying nice things about me on my birthday and I thought that was so cool.  So, that is a tradition in our house now.  I will put the sticky notes around the upstairs with nice messages, and then downstairs in the kitchen I'm going to put this little treat container:


Dynamite Treats!  I put M&M's in the middle of each roll.
Want to make one?

Wednesday, February 1, 2012

Home-Made Stamps for Kids


Alright, so I originally saw this idea on Pinterest, I believe, and I wish I knew which website to give credit to. Basically all you do is take foam stickers (I got mine at the dollar store) and caps.  The website I saw used milk caps...which we did, but I ended up using Gerber Baby food lids.  They were the perfect size for the foam stickers I bought.  The other caps I ended up using were Snapple lids! I L.O.V.E. those facts on the inside of their lids.  Have you ever gotten Snapple and read those facts? Fabulous idea by the Snapple company!  So, the great thing about this project is not only can we stamp, but we can read the facts while we stamp! YAY!


Here are the foam stickers we used.


Here are the Gerber lids we used.


All we did was peel the back off and stick them on! Super fun and simple!  The other great thing about this project is that since there are a million and one stickers in the bag, so when we're done stamping we just rip the sticker off, throw it away, use a baby wipe to clean off the ink from the lid, and stick another sticker on! New stamp, Voila!


I hope you try this project!

Happy Crafting!

Smiles,

Jill


Tuesday, January 31, 2012

Valentine Topiary


Have you ever started on a project with one thing in mind and ended up with something totally different when you were done?  Well this little topiary of mine started out as a decorative ball.  I was going to make a bunch of them and put them in a vase, but then the idea of a topiary came to mind.  So here it is:


I used the cricut cartridge "Straight from the nest" to create the flowers.  If you don't have that cricut cartridge, you could use a flower punch.


To create this topiary:
Styrofoam ball, wooden rod, cotton, tulle, flower pot, white pearl headed pins, flower pot foam

1. Paint your styrofoam ball the same color you plan to make your flowers
2. Punch out all the flowers or use Cricut Cartridge Straight from the Nest flower at 1.0 in.
3. Use pins and poke holes in the flowers
4. Once the paint is dry put flowers and pins in the styrofoam ball
5.Paint rod and flower pot to desired color.
6. Cut rod to height preference
7. Stick rod into styrofoam ball, make sure to hot glue rod and then stick it in
8. Place rod into potting foam (sorry I know it's not the technical term, but the floral foam you use for fake flowers..it's green...) and place it into pot.
9. Place cotton on top of flower foam....I actually used polyfil because that is what I had on hand.
10. Cover with tulle. I hot glued the tulle around the pot.
11. Enjoy!


***This just in......this project was featured on Lil Luna, Decorate to Celebrate, and My Craft Spot!***


Happy Crafting Everyone,

Smiles, 

Jill

Linking up to

Monday, January 30, 2012

A day late and a dollar short


Today I went to enter my "Rosette" project into The Paper Variety's Challenge. I soon realized I was a day late and a dollar short...isn't that how the phrase goes?  Anyways, I still wanted to share with you my project because I think it is fun and you could potentially use it as a Valentine decoration if you wanted.


 All I did was take a Jones Soda ....if you can't tell I'm obsessed with Jones Soda a bit...here's another project I made..now I don't drink pop all the time but if I'm going to I want a Jones!..Anyways, you could take any bottle..I actually wrapped that bottle with macrame yarn (if that is what it's called, forgive me for not knowing the technical term) You may wonder what I'm doing with a huge ream of Macrame yarn...well, my in-laws were helping my grandma in-law clean out her garage and they said "You're crafty. I bet you could find some way to use this HUGE ream of yarn!" So I did!  You could use regular yarn if you don't have a HUGE ream of macrame yarn lying around! ha!  I just hot glued it at the bottom and wound it around and hot glued along as I went.

Once I was all done my project looked like this:


I didn't like the looks of it and thought it needed a little bling! So, I added a rosette.  The tutorial I followed was Creations with Christina's.   Here's a close up:


Here it is altogether! Happy little flower in it's happy little vase!


Hope you're having a super day!
Happy Crafting
Smiles, 
Jill


Linking up to
tatertots and Jello
30 handmade days
Paper Issues
Lil Luna

Sunday, January 29, 2012

Sundays are Lovely #5


What is a link party?  A link party is a place to share your crafts and to get ideas! How do you enter your project? Go to the very bottom and click on the little blue button.  Then all you have to do is follow the directions from there.  It's a fun way to check out other blogs, so I really hope you will join me! I enjoy looking at everyone's projects and I hope you take the time to look too:)

Now you can link up ANY project...new or old!  For example, if there is a project that you did last year for Valentine's Day and want to show it off...by all means go ahead! It doesn't have to be Valentine's though, that was just an example. You can also link up as many projects as you like!

The most viewed project this week was

Holly's! Way to go, girl!


Don't forget to add a link or my button to your post!

Happy Crafting!
Smiles,

Jill

Saturday, January 28, 2012

Valentine Wreath


My door needed some "LOVE"! So, I made this little wreath for it!


A big 'Thank You' goes out to Whisker Graphics because that is where I got the XO banner. The burlap was from Michaels.  The wreath was from The Dollar Tree.  The red and white polka dot ribbon is leftover ribbon from a bow I made for my daughter..I believe it's from Hobby Lobby.  The fabric for the flowers is from an old shirt. The pearls are just leftover from some earrings I made.  So this wreath was super cheap to make but I think cute for the door.  What do you think?  If  you want a tutorial for the flowers you can find that here.

Thanks for taking a peek at my new "LOVELY" wreath!

Happy Crafting!

Smiles,

Jill
linking up to
3o handmade days
 I heart naptime
Decorate to Celebrate
Be Different Act Normal
Tatertots and Jello
The Girl Creative
Lil Luna
An Original Belle
It's Overflowing

LinkWithin

Related Posts Plugin for WordPress, Blogger...