

Friday, September 30, 2011
Happy Birthday, Dad!
I'm sure you've seen all the subway art around in the blogosphere;) Well, I just love it, and I love those personalized birthdate plaque thingys that are on Etsy. So I decided to make my own. We have a janky old word program on our computer, so when I printed out the subway artish plaque for my dad it wasn't what I wanted it to be. The words were sooo far apart from eachother and I wanted a more cohesive look, so I added lines. I initially drew them on....not good! Then I decided to just slice up black paper and use a Zig 2 way glue pen to attach them randomly. I loved the look. Here is the final product!

Sunday, September 25, 2011
Friday, September 23, 2011
Bow ties for little boys
I've been wanting to make a bow tie for my son for quite some time now, so here's how it turned out....

 |
| As you can see, in the top photo, my son was very busy. He was not interested in taking photos at this time. |

Then he saw his Papa and, as you can see, his face just lit right up.
Thursday, September 22, 2011
DIY Mothers Necklace
I've noticed some of my friends and their moms have these cool Mothers/Grandmothers necklace, so I decided to give it a go and make my own!


Tuesday, September 20, 2011
Ribbon Headbands with detachable Korker bows
***** This just in....here is the tutorial I learned how to make these headbands with. go here*******


Here are the ribbon headbands with detachable Korker bows.
Another item for the craft show on Nov 12th. They
come in many different color combos.
Shown above is royal blue, white, and turquoise with white polka dots
Great for spirit days for school!
Enjoy!

Another item for the craft show on Nov 12th. They
come in many different color combos.
Shown above is royal blue, white, and turquoise with white polka dots
Great for spirit days for school!
Enjoy!
Wednesday, September 14, 2011
First Day of School

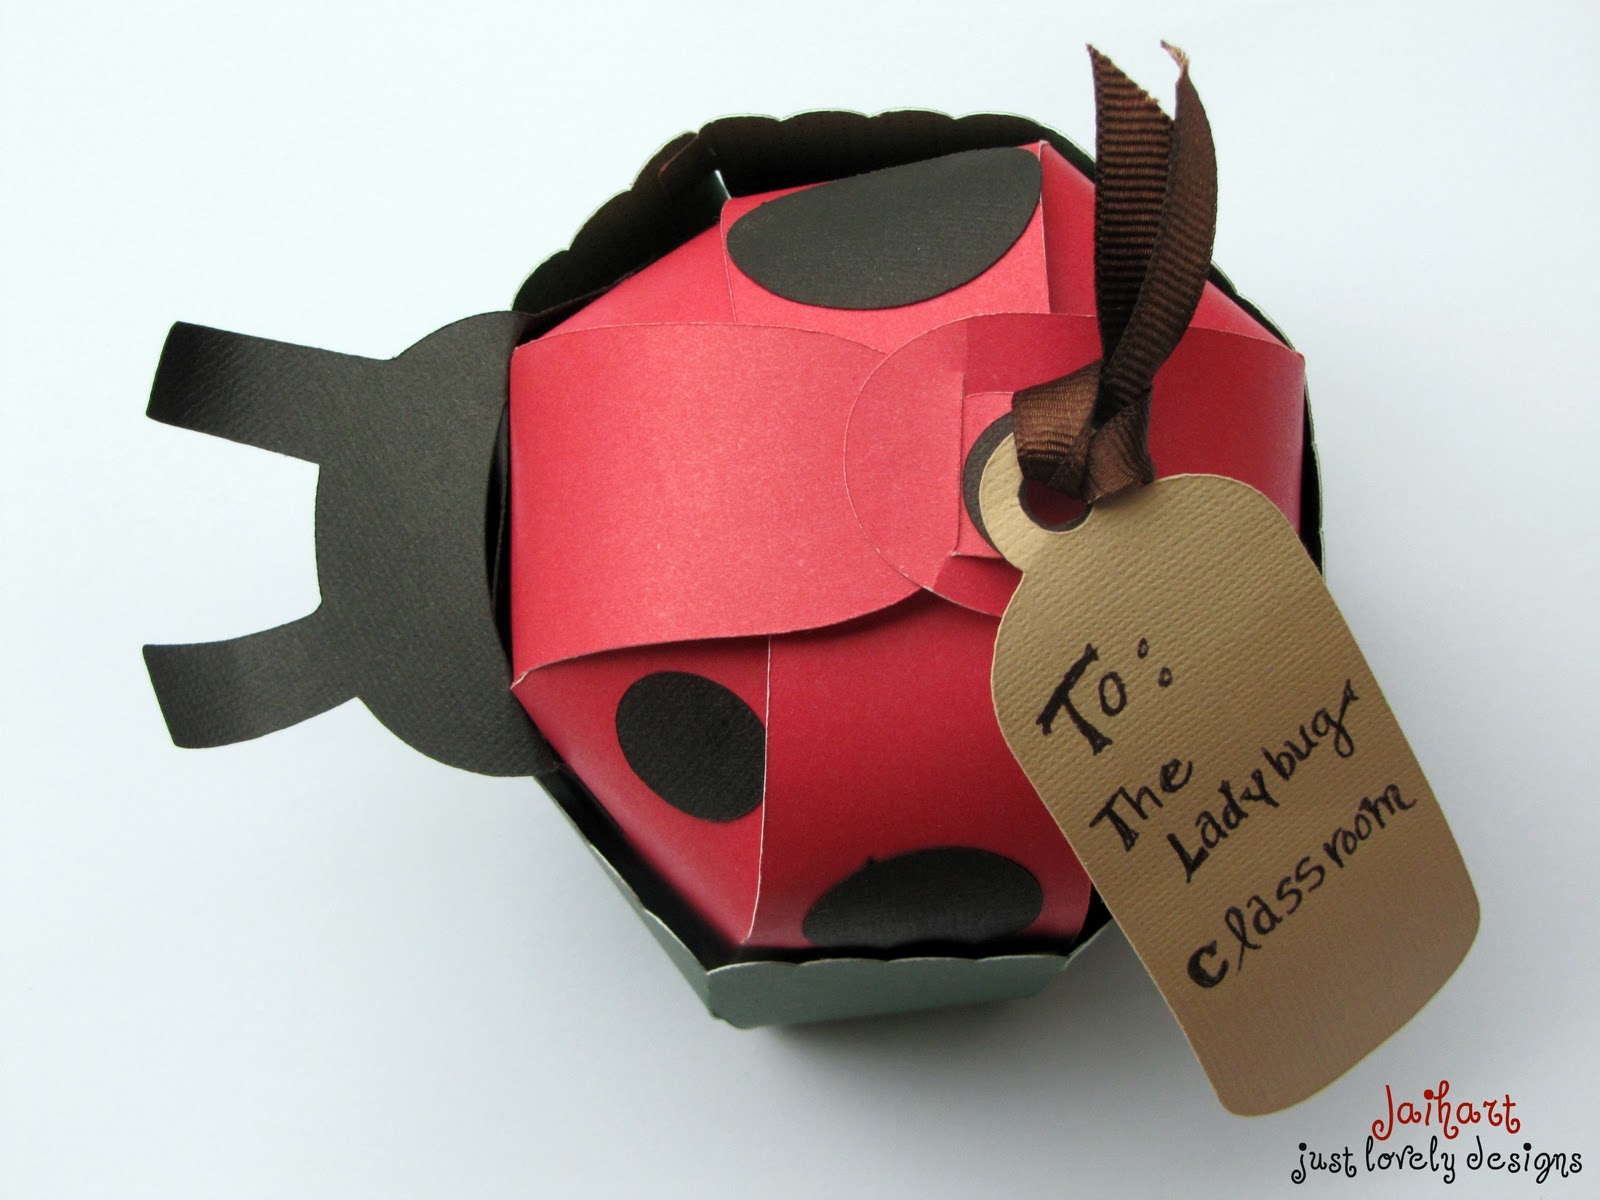
I can't believe my son is in preschool! Craziness! Anyways, he's in the 2 year old program a couple of days a week. His classroom is named "The Ladybug Room". So I decided to make a gift for the teachers. I almost forgot to mention, I'm in a group called MOPS. I'm a table leader, and our table this year is called "The Ladybug" table...I didn't even pick the name! I lucked out, huh! So, I made these for the ladies at our table too:)

Ladybug magnets! They are in the front and in the back is how I packaged it.
For the Magnets: This project is super simple and you can do this with many different wooden shapes. Just buy the prepainted wooden shapes and hot glue a magnet to the back of them.
For the Box: Just assemble the box, put the magnets inside, wrap a ribbon around it and tape it at the bottom using scotch tape. Then cut out the lady bug in black and the top in red. Attach them to the ribbon using the dimensionals!
Recipe:
Cricut: Walk in my Garden cartridge 2 in. ladybug
Black Cardstock
Red Cardstock
dimensionals
Ladybug Ribbon from Hobby Lobby
Painted wooden ladybugs from Hobby Lobby
Circle Magnets from Michaels
White box from Target-
( I got the boxes many years ago
and don't know if they
still have them...sorry)
Have a great day!

Subscribe to:
Posts (Atom)
LinkWithin
