Saturday, October 22, 2011

Cooking With Cricut Blog Hop

Welcome to Jaihart (J♥) and the CookingWithCricut.com “Adopt A Shelter Pet”  Blog Hop!


CookingWithCricut.com

October is National Adopt a Shelter Dog Month, but we wanted to honor and celebrate all of our furry friends!   If you've come from visiting Nita at Nita Notes, you're in the right place! p.s. She's from Canada and my husband was so excited when he found that out;) He has Canadian relatives! Also, she made the cutest teddy bear chef card for our #55 challenge (check it out)! If  you've just happened across my blog and would like to hop along with us, you can go to CookingWithCricut.com and start at the beginning.

 Here is my Rhodesian Ridgeback, Leo! He's 5 years old and is the best dog ever! He is wonderful with my children and very protective of us.  We love him very much!


Isn't this just hysterical!  We had these taken when my son was 14 months! I just had to share it!

Saturday, October 15, 2011

Giveaway, WINNER!

Congrats to Moira on winning my blog Giveaway.  Moira visited StarSunflower Studio and said "What a great idea Jill! So creative!" 


Moira's choice for her prize is a tie onesie! Congrats again, Moira!


Friday, October 7, 2011

I'm a guest blogger today + Giveaway!


Head on over to Starsunflower Studio!
I'm a guest blogger and check out the tutorial I did on how to make an easy baby toy!
 I'm going to be doing a giveaway! The winner will receive your choice of a set of notecards or anything of your choice from my shop. 

Wednesday, October 5, 2011

Christmas Cards already...? Yes! My Pink Stamper Challenge

I was in the store the other day and heard Christmas music! Yes, that's right, Christmas music!  Someone shouted, "Christmas music already? Come on People!"  I just started cracking up!  It may be a little early for Christmas music, but not Christmas card making! My Pink Stamper has a challenge going on so I decided to make a card. Here it is:


Tuesday, October 4, 2011

Bitten By the Bug 2 Wheelbarrow Challenge/I'm a Winner!

So my husband made a craft room for me in our unfinished basement. You can check it out here.  There was a lot of left over scrap wood.  My husband was getting ready to throw it all away until I stopped him and said "You can't throw away all that wood, think about all the decorations I could make with this wood!" ha!  He gave into my idea, and so I was able to keep the scrap wood, save the environment, and make this cool sign:


I will be entering this sign into a challenge at Bitten By the Bug 2.  
The challenge was to use a wheelbarrow in your project. Check it out here.
By the way................................................................

Monday, October 3, 2011

Pumpkin Project for Kids

Last Friday, my mom, my kids, and I went to a pumpkin patch in town.  Oh my goodness, do they have the varieties....wart looking, white, Cinderella, Long with white stripes....I can't even remember them all there were so many. Which pumpkin did my 2 year old choose, you ask..... ?


The little pumpkin.
The ones that are 4 for $1....which is great for the pocketbook, but out of all the choices...big, tall, skinny, striped, white, bumpy, warty. Yep that's right, the little pumpkin:) He's so funny!

Sunday, October 2, 2011

Popping up to say Hello!

    Yesterday was WORLD card making day!  I had no idea there was a "card making day" let alone a WORLD card making day. So since it's pretty much a big deal....I decided to make this little cutie:) My son is really into toast right now.  Every meal....toast, momma...no matter what we are eating...toast momma....2 year olds are so funny! Anyways, so when I saw this little piece of toast I thought it was just great!  I want a stamp that says, "Popping up to say Hi"  My Pink Stamper...do you have one with that saying? If not, you can totally steal that from me,  just send me a stamp so that I can stamp it on my card;)


Friday, September 30, 2011

Happy Birthday, Dad!

I'm sure you've seen all the subway art around in the blogosphere;) Well, I just love it, and I love those personalized birthdate plaque thingys that are on Etsy. So I decided to make my own.  We have a janky old word program on our computer, so when I printed out the subway artish plaque for my dad it wasn't what I wanted it to be. The words were sooo far apart from eachother and I wanted a more cohesive look, so I added lines. I initially drew them on....not good! Then I decided to just slice up black paper and use a Zig 2 way glue pen to attach them randomly.  I loved the look.  Here is the final product!


Friday, September 23, 2011

Bow ties for little boys

I've been wanting to make a bow tie for my son for quite some time now, so here's how it turned out....

As you can see, in the top photo, my son was very busy.
He was not interested in taking photos at this time.  
 
Then he saw his Papa and, as you can see, his face just lit right up. 

Thursday, September 22, 2011

DIY Mothers Necklace

I've noticed some of my friends and their moms have these cool Mothers/Grandmothers necklace, so I decided to give it a go and make my own!


Tuesday, September 20, 2011

Ribbon Headbands with detachable Korker bows


***** This just in....here is the tutorial I learned how to make these headbands with. go here*******


Here are the ribbon headbands with detachable Korker bows.
Another item for the craft show on Nov 12th.  They
come in many different color combos.
Shown above is royal blue, white, and turquoise with white polka dots
Great for spirit days for school!

Enjoy!


Wednesday, September 14, 2011

First Day of School


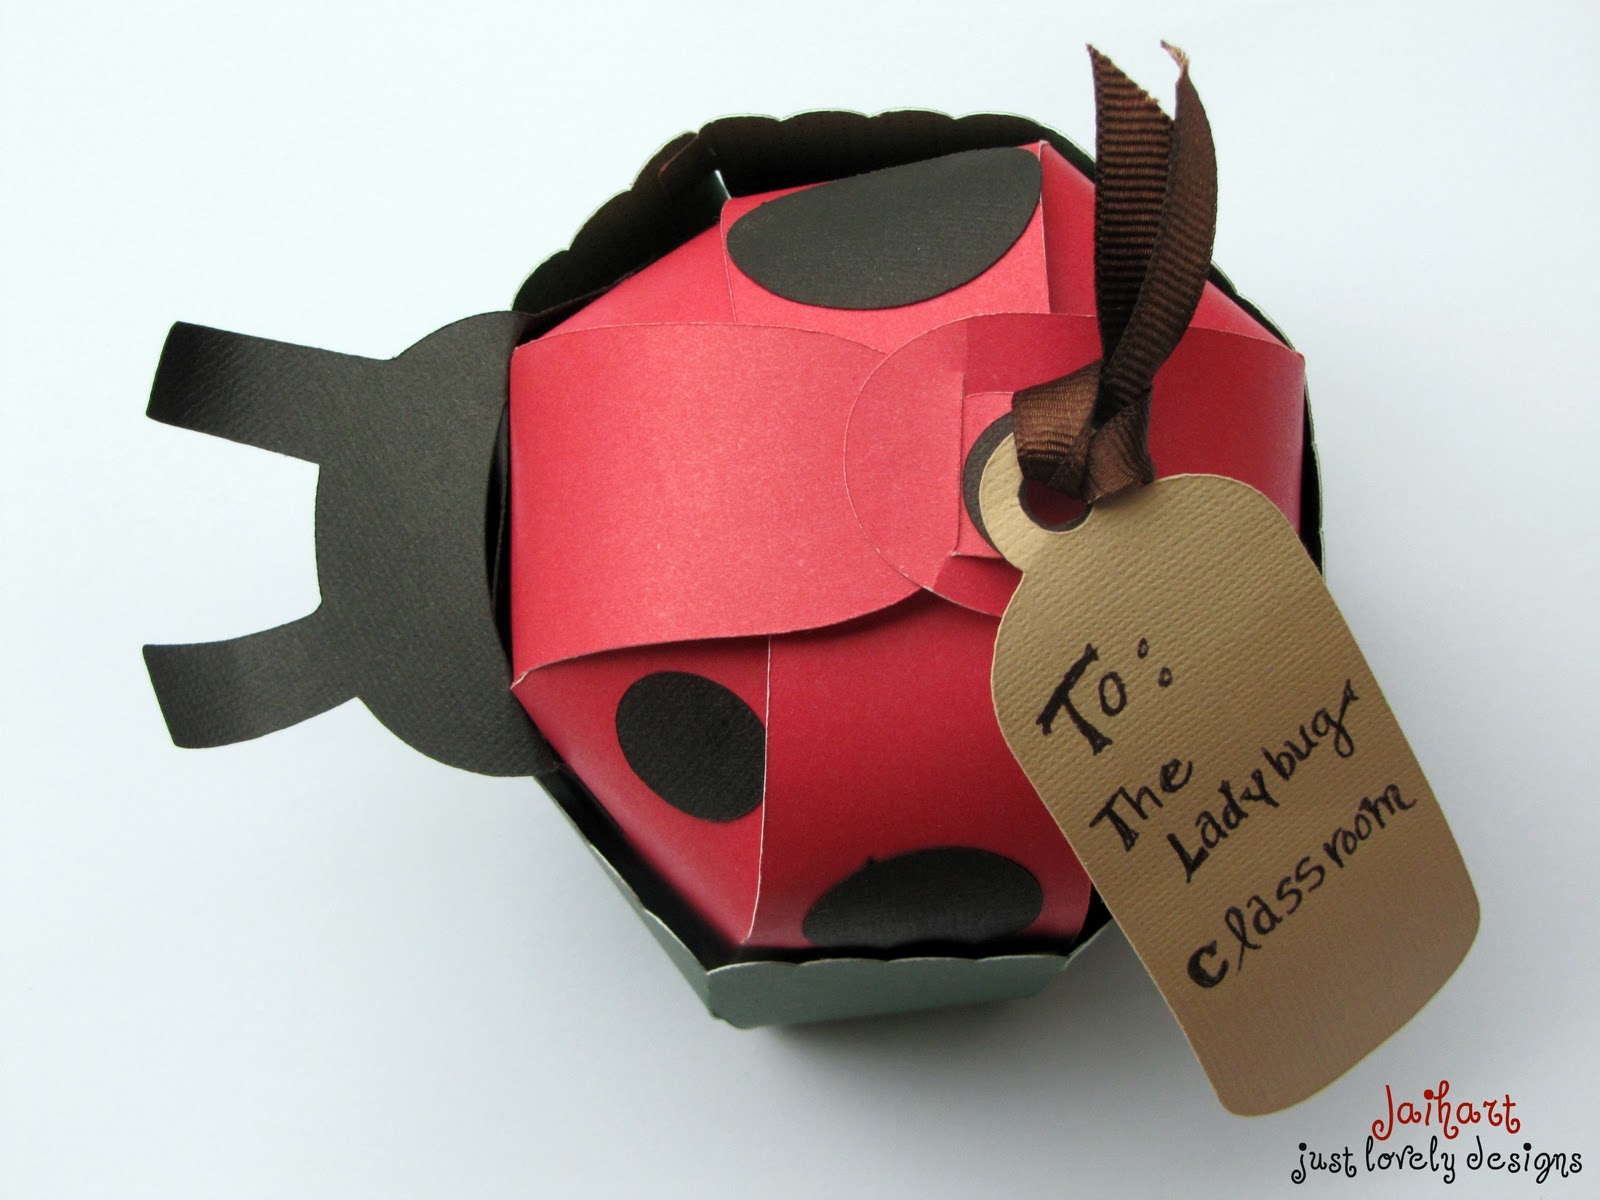
I can't believe my son is in preschool!  Craziness!  Anyways, he's in the 2 year old program a couple of days a week.  His classroom is named "The Ladybug Room".  So I decided to make a gift for the teachers.  I almost forgot to mention, I'm in a group called MOPS.  I'm a table leader, and our table this year is called "The Ladybug" table...I didn't even pick the name!  I lucked out, huh!  So, I made these for the ladies at our table too:)


Ladybug magnets!  They are in the front and in the back is how I packaged it.

For the Magnets:   This project is super simple and you can do this with many different wooden shapes.  Just buy the prepainted wooden shapes and hot glue a magnet to the back of them.  

For the Box: Just assemble the box, put the magnets inside, wrap a ribbon around it and tape it at the bottom using scotch tape.  Then cut out the lady bug in black and the top in red.  Attach them to the ribbon using the dimensionals! 

Recipe:
Cricut: Walk in my Garden cartridge 2 in. ladybug
Black Cardstock
Red Cardstock
dimensionals
Ladybug Ribbon from Hobby Lobby
Painted wooden ladybugs from Hobby Lobby
Circle Magnets from Michaels
White box from Target- 
( I got the boxes many years ago 
and don't know if they 
still have them...sorry)

Have a great day!


Saturday, August 13, 2011

Two Two Birthday Party!

My son just had his 2nd birthday!  I can't believe it!  Anyways, it was a ton of fun and here are the highlights:)


                                                    The Invitation


                                                        The Entrance


(The shadow of the tree ended up on my husband and son's face:( This is the only pic we have of all four of us from the party. Can you believe it? What a shame:(  )


The Cake Table

              The cake I learned how to make on BettyCrocker.com This was the first shape cake I've ever made and it was fun and quite simple!


The cake pops were a big hit!  Everyone loved them!  They're easy to make too!  I learned on YOUTUBE.  Just go to youtube and type in cakepops.  They're so fun to make!


The Craft


The kids painted choo choo trains with their name on it.  I used my cricut machine to cut out each child's name using vinyl lettering.  Then I put their names on the trains.  The kids used sponge brushes and all different colors of paint.  They painted the choo choo and painted over their name too.  Then when the paint dried they peeled off the vinyl lettering and then their name was on the train with the wood grain showing through. It was a big hit!


The Birthday Gift: Train Table


Fun theme and best of all my son LOVED his train table! 


Friday, August 5, 2011

I LOVE my Husband!

Here is my craft room that my husband built for me!  A special thanks to my father in-law and bro in-laws for helping build it! My craft room used to be in one of our upstairs bedrooms, but we needed that space for my daughter who was just born.  So my lovely husband decided to take part of our unfinished basement and turn it into my craft room!  Did I mention..I love my husband?!


LinkWithin

Related Posts Plugin for WordPress, Blogger...